Coming Soon

Creative Chicks Blog Train
The Creative Chicks Blog Train
Everyone should be on board
September 30th
The first Kit is
Creative Chicks Autumn
 |
| Ai Generated If the Link isn't working to Download, just let me know. |
The Second Kit is
Creative Chicks Halloween
 |
| Ai Generated If the Link isn't working to Download, just let me know. |
Click Here
MORNING DRUG Tutorial
MORNING DRUG

I have written this tutorial for you as a guideline. You can do the way you want to fit your needs. However, remember this tutorial is my work. My tutorials I write are my own dreams and nobody else’s which is entirely simultaneous.
Supplies I used
I used Scorching Tube by Keith Garvey. You can purchase here.
(If you don’t have license # they can help you get one).
I used Miz Coffee Time by MizTeeque and you can get it here. Make sure to read her Terms of Use please.
(Thank you for sharing your FTU Kits)
Here We Go
Open your Graphic Software and Lets start.
Open New Image 700x700 and keep the background transparent.
Open Kit, find element Frame3 and copy & paste it new layer, then hide it.
Duplicate element Frame3 and resize it to 70% and do that 2 more times or you like. Then you need 5 copies of frame3 and put them around the big frame 3. Look at my tag to see what I mean.
Open kit, find Paper7, Click on each of the duplicate frames and use your magic wand and expand it 4 pixel and copy paper and paste in selection. Make sure Paper layer is below the frame. You keep doing this until all 5 duplicate frames are filled with the paper.
Open Kit, Find Paper 12, Click on the big frame and use magic wand expand it 4 pixel and copy paper and paste into selection. Make sure paper layer is below the big frame.
Open Kit, find Element14, Click every other Frame and copy and paste into selection. You might have to do the frames one at a time. Make sure the elements are below the frame.
Open kit, Find element2, Click every other Frame and copy and paste into selection. You might have to do the frames one at a time. Make sure the elements are below the frame.
After you have all the elements in each duplicate frame, you need to merge them. What I did is, click on the frame and merge down 2 times until the element and paper are together with the frame. You need to do that with all the other duplicate frames. Keep the big frame the way it is right now.
Open Kit, find Element 18, Copy and paste element and put layer under the big frame and paper. So it is the last layer on the bottom. You should have 4 element18, two horizontal and two vertical. Let the element show on top and bottom. Look at my tag to see what I mean.
Open Kit, Find Element 25, and new layer. I put the element on the bottom left. Resize them 70% or your liking.
Open Kit, Find Element 15, and new layer. I put the element on the bottom left laying on Element25. Resize it 70% or your liking.
Open Kit, Find Element 6 and 7 and resize it to 70% or your liking. Place them behind Element 25 and 16.
Open Kit, Find element 9, and new layer. I put it on the bottom right. Resize it to 70% or your liking.
Duplicate your big frame, Open up your close up tube, place underneath the first big frame. Click on the big frame that is above your tube, and erase the top of the frame so, your tube looks like it’s outside of the big frame. Resize my tube 90% twice.
Make sure you have all copyright Info and whatever name you want on it. Save and Merge!!
© Jen Hill http://jensfunplace.blogspot.com - All Rights Reserved.
It has been a long time
It’s been a long time since, I been on my blog.
A lot has been happening online and my life. I been working to pay bills, you know living the reality world. Don’t get me wrong 😑, I love my reality world. I have many friends around me, I have different life style/ then most of the people I see everyday.
I haven’t met any local people yet that does these Signature Tags, in ways it is cool at the same-time it’s too bad. It took me a bit to get to know how to do things with Elements /objects themes, Color themes, Font themes, Mask themes, and so more.
I have notice some things been added to Our Forum Groups. Also, another thing is for all the people out there loves making tags. Ai is the new thing now, well it’s more out there now. I am ok with it, but I am not. I do agree in somewhat about Ai taking away artists who does this a living drawling using tool, time labor and so on. But then it may help Art businesses to just advanced to it, might make a difference for both pros/cons reason to use it.
I don’t know, I think people who make’s these scrap kits are beautiful, both ways. Sometimes I can’t tell the difference from Ai and human. I tried to some scrap kits they were very hard. I haven’t been in the mood to do some advance Scrapkits yet . Right, now I have couple of projects at home that needs my time and focus .
Here are some painting I been doing at home. Forgetting my bloggers is a sin, it would if I had any. 😝


Partial Frog DP
This one was my first one , partial Diamond 💎 s . I made this for LuKas my son and okay, made it a hobby.
My Title Of Tuts
Jen's Tutorials
©Jen Hill
Please have respect for other people's property, The key is if you don't like people stealing or touching without your permission, then you need to think before you do it to others.
These Tutorials are for you as a guide to help you, not to take or say it is your own. I don't mind making Tutorials if it helps you learn. These Tutorials I write or not other ideas, there are mine and mine only. If you have a problem with my Tutorials, that is your opinion and its not my business. However, if I do see my tutorials, on websites, forums, or anything that I have not to give you permission, there will be consequences to your actions on how I will pursue this situation.
If you like to use my Tutorials for helping you or other people who would like to use them, you can either give them the link to my blog or just ask if you can have permission to post it on your Forum, Blog, Website.
Titles Of My Tutorials
1. Jar Lamp Shade Tutorial
2. Morning Drug Tutorial
3. Pretty Blossom
4. Sandy Beach
5. Someone Special
6. Summer Moment
7. Violet Fairy
8.Wild Thinker
I will be posting each one of these Tutorials Soon.
2. Morning Drug Tutorial
3. Pretty Blossom
4. Sandy Beach
5. Someone Special
6. Summer Moment
7. Violet Fairy
8.Wild Thinker
I will be posting each one of these Tutorials Soon.
Valentine Day Bingo Cards
I will be placing some Valentine Day Bingo Cards below
Here are an example of the Bingo Card Looks like. If you would like to use these Bingo Cards for your forum, classroom, for party games. Let me know and I will definitely make you some and put them in a zip file for you.
6 Valentine Bingo Cards -
If you need more Valentine Cards please let me know in advance.
1 Lip for the markers -
You can duplicate them so you will have enough lips to put over the words.
Example what they look like
Image is coming
Valentine Bingo Card
Image is coming
Lip Marker for your Words
I hope you Like what I am Offering, Let me know if you want these.
My Jar Tutorials

My Jar Lamp Shade Tutorial
This tutorial is written by me, it is for your as a guideline to learn and gives you the opportunity to be creative. Please do not claim this tutorial as yours, do not copy and paste it on any websites, forums, blogs without my permission. I work really hard writing these tutorials for people who wants to learn.
I really want to keep my Tutorial for free to be used, so please have
respect for the people who write tutorials for you. My tutorials I write are my
own aspiration that I enjoy doing this for people who like to try. If you like to
use this Tutorial for your Website, Blog, Forum all you need to do is send them to my blog, where the Tuts are. You can also find me over at Creative Chicks Forum
Let’s get started


(Just email me that you would like me
to write a tutorials for both of the other program/software.)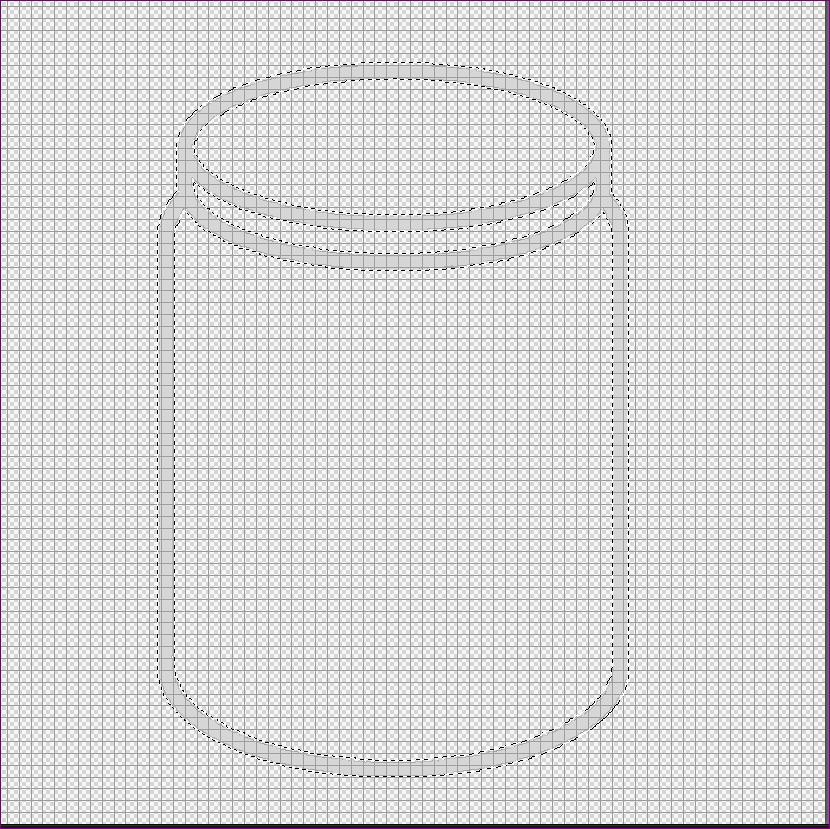


If you are happy with what you see
so far, click on Selection and click none. So, the Marching Ants are not there
anymore. We will come back to this one later to do some more work.

If your Layers look like the above image then you are ready to go on to the next step.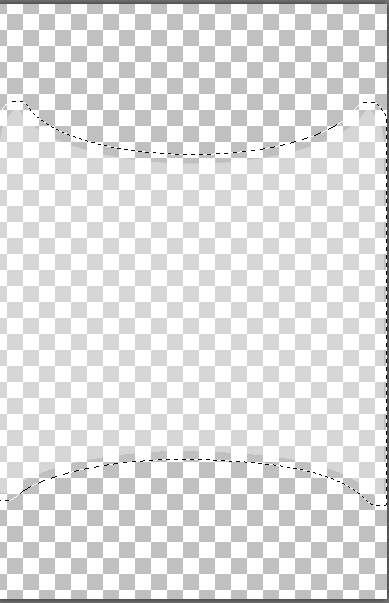

We have couple more things to do with the Jar and then we will start with Making the Lamp Shade.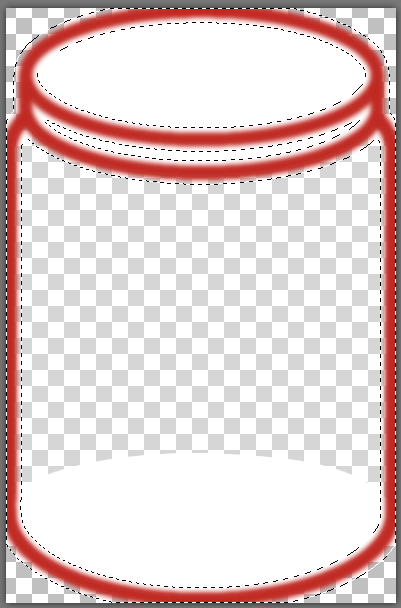
Supplies you need
I have zipped up the supplies that
you need below.
My Jar Selection
Click Here to get the Supplies for the Jar
Open your Paint Shop
Open new image to 700x700 and
make sure the transparent is checked. You should have plenty of room to
work in.
You will need to create 5 Layers and
If I were you, I would make sure to Label them what they are.
Which they are: Line of Jar, Bottom,
Glass, Rim, and Top
After you got all your Layers all
done you are ready to put the Jar together.
Go to your Toolbar and find
Selections
Click selections, Drop Down window
will appear and find Load/save Selections
Side Drop Window will appear and
click on Load Selection to Disk
Find the Folder My Jar and click on it
You should see 5 items in the folder
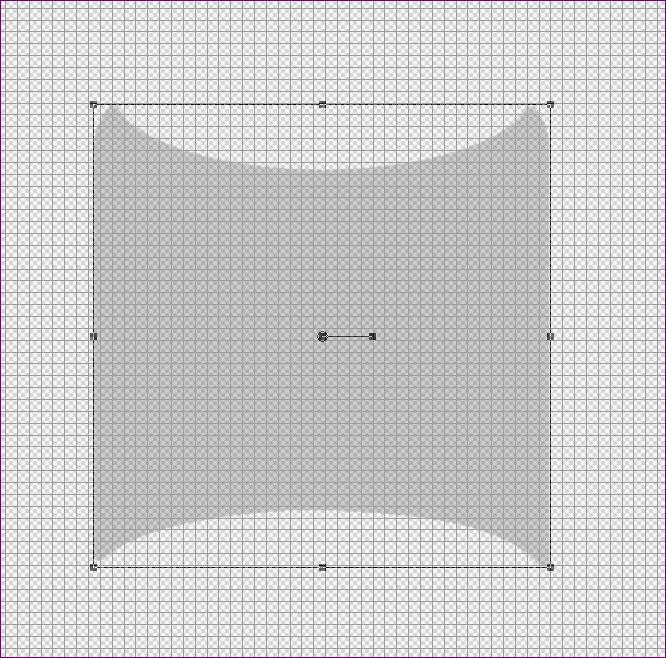
Let's start with the Body (line) Jar selection,
which is the line of the jar. Click
on it and click load. You will see those Marching Ants that shows you the outline of the Jar. Make sure the
Layer you are working on is highlighted in blue. We are going to Color the
Lines of the Jar. Click on your Flood Fill Tool and pick any color you want.
When you choose a color, you need to fill that color in between the lines. The
lines should be whatever color you choose. You can now click on selection and
click none. So, the Marching Ants are not there anymore.
Don’t worry about how the jar looks like
right now, I will be showing you later on how to move everything to the center.
So, your Body Line Jar Layer should
look something like this
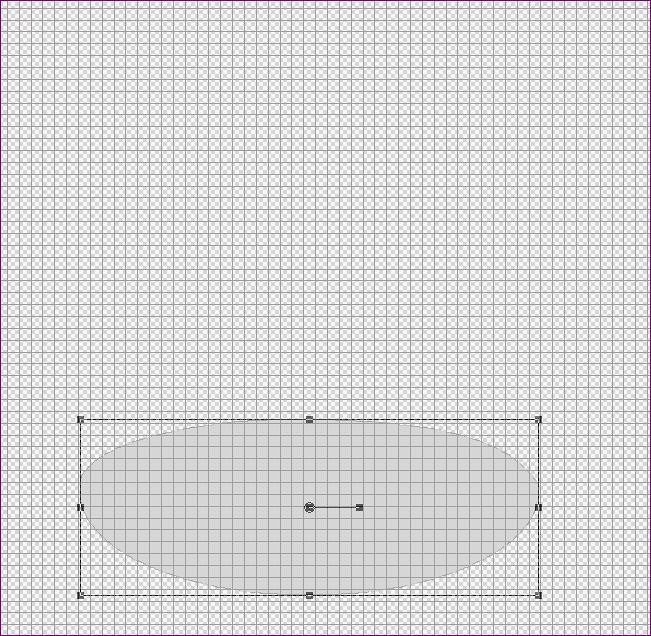
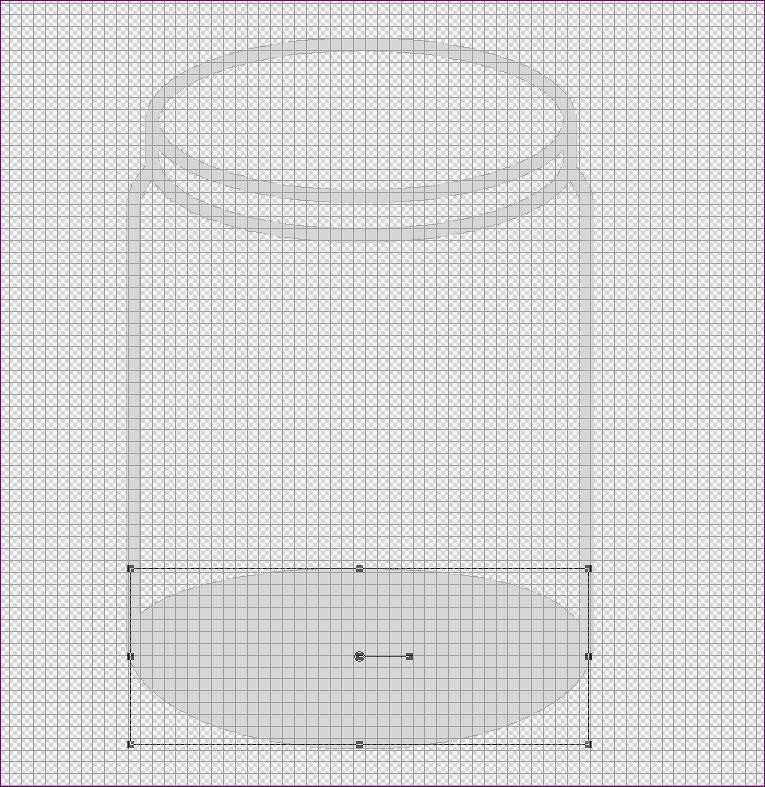
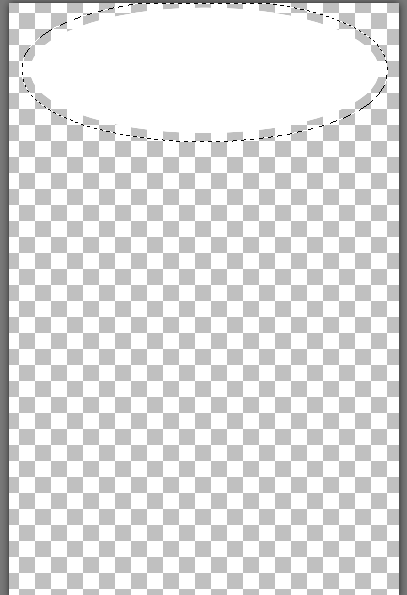
Lets go to the next Layer Bottom selection
do the same thing, click on Selection, click on Load/Save Selection, and click on Load Selection to Disk. Find the fold My Jar and click on Bottom and Load.
(Make sure that the Bottom Piece is Label Bottom and its above the Jar Line, Hide the Jar Line so you only see the one you are working on.)
You should see the marching ants outlining the image, this means you are ready to use your Flood Fill Tool and pick a color and fill the bottom selection whatever color you choose. If you are happy with what you see so far, click on Selection and click none. So, the Marching Ants are not there anymore.
It should Look like this, when it's done
Lets go to the next Layer Jar Glass selection
do the same thing, click on Selection, click on Load/Save Selection, and click on Load Selection to Disk. Find the fold My Jar and click on Jar Glass and Load. You should see the marching ants outlining the image, this means you are ready to use your Flood Fill Tool and pick the color white and fill the Jar Glass selection.
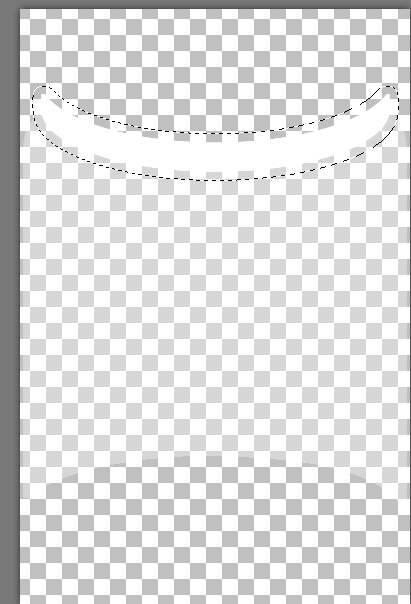
Lets go to the next Layer Jar Rim Selection
do the same thing, click on Selection, click on Load/Save Selection, and click on Load Selection to Disk. Find the fold My Jar and click on Jar Rim and Load. You should see the marching ants outlining the image, this means you are ready to use your Flood Fill Tool and pick any color you want and fill the Jar Rim selection.
So Your Jar Rim Layer should look something like this, before you fill the color, make sure you have those Ants Marching
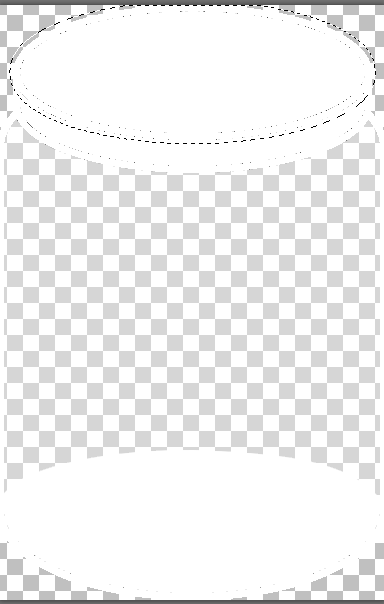
Lets go to the next Layer Jar Lid1 Selection
do the same thing, click on Selection, click on Load/Save Selection, and click on Load Selection to Disk. Find the fold My Jar and click on Jar lid1 and Load. You should see the marching ants outlining the image, this means you are ready to use your Flood Fill Tool and pick any color you want and fill the Jar lid1 selection.
Let’s make sure we center the jar; this is how you do it.
You need to go to your Layer Palette on your right - You see all your Layers you have done
You need to make sure all those
layers are highlighted in blue
Your first Layer should be already Highlighted
Hold your Control Button and Click
the next Layer
And you just keep doing that until
it looks like this
When you look at your Layers it should be in these orders
Outline Jar
Lid
Rim
Wall Jar
Bottom Jar
If your Layers look like the above image then you are ready to go on to the next step.
On your Tool bar in your program you
will need to click Objects
Then click Align
And go all the way down until you
see Horiz Center in Canvas
Your Jar should be in the center of
the canvas now.
Make sure your Layers are in order, if they are not just drag them up or down wherever they need to be at. Just like the Image above
Now we need to go back to the Glass Layer
Click on the Glass Layer so it will
be active
You should see on your Layer Pallet
the word Normal and the number 100
This is called Blend Mode
If you don’t see it on your Pallett,
click on your Flood Fill Tool and you will see it on the tools where you can
change the settings.
We need to click the little arrow
that is next to the word Normal, you will get a drop-down window with all the
Blend modes
We need to click on Soft Light, it should look little bit more darker and faded.
Your Jar should now look like this
We have couple more things to do with the Jar and then we will start with Making the Lamp Shade.
Since your Jar looks like a Jar now we are going to design the Lid and put something in the jar.
Click your outline Layer and use your Magic wand tool and click the Outline of the Jar
Now we are going to pick out a Free image background that matches the Jar above
My Home From Home
Welcome To My Home From Home
I decided to create a place where I can show off my Creations, Ideas, and other skills I have under my sleeves. I do have another blog that I use for what you call a Forum I run. When I get situated with this blog, by getting everything to transfer to this blog. Then I will decide if that blog is worth keeping.
For now, you will see this blog has good days and bad days. I am hoping to create an awesome blog for myself to show off all the creative work I do in the digital PSP Sig-Tag and the Crafty Art world I live in online. Come back more often so you can see how my blog is doing and you never know you might like something on here.
Subscribe to:
Posts (Atom)
-
Coming Soon
-
Welcome To My Home From Home I decided to create a place where I can show off my Creations, Ideas, and other skills I have under...
-
The Creative Chicks Blog Train Everyone should be on board September 30th The first Kit is Creative Chicks Autumn Ai Generated If the Lin...
